Category: Javascript

Client and Server side Javascript, a powerful runtime coming in to its own.

  • Firefox extensions with Travis CI

    Developing an extension for Firefox is no different than developing anything else and CI is a good idea. It’s actually very easy to use Travis to run your test suite. For those that don’t know, Travis is a great resource for running CI on your open source projects for free.

    Travis will install any version of Firefox you need and as it has them cached it’s much quicker than downloading it yourself. Specify the version with an addons element. The commands in the before_script section setup a headless window service and unpack Firefox. The tar command uses a wildcard to match the Firefox version requested, less to remember when updating the version. The environment variable JPM_FIREFOX_BINARY tells jpm where to find Firefox. This should be all you need to run jpm on any jpm based extension with Travis.

    language: node_js
    env:
      global:
        - DISPLAY=:99.0
        - JPM_FIREFOX_BINARY=$TRAVIS_BUILD_DIR/firefox/firefox
    addons:
      firefox: "38.0"
    before_script:
      - sh -e /etc/init.d/xvfb start
      - tar xvjf /tmp/firefox-*.tar.bz2 -C $TRAVIS_BUILD_DIR/
      - npm install jpm -g
    script:
      - jpm test
    

    You can see this in action with a little project of mine over at Travis.

  • Checking in Bower dependencies

    I’ve seen a few places recommending that the bower_components folder should be checked in to your version control system. This is wrong, it will just add unnecessary bloat to your repo and risk your dependencies going stale. The only good reason I think of is to avoid having to run bower install all the time but if your developing a Node app there is no need. I can think of some bad reasons as well, like changing the code in the Bower managed dependencies. Least said about that the better.

    I’ve talked before about the NPM lifecycle scripts before, well these can be used to integrate Bower. When you run npm install to install your NPM dependencies you can hook in to it and call out to Bower.

    "scripts": {
        "prepublish": "node_modules/.bin/bower install"
    }

    I recommend giving the NPM docs a read. It’s important to understand the possible impact of the different hooks. When you want to run in the install phase it’s recommended to use the prepublish hook instead of any of the actual install hooks. For the above code snipet to work you will also need to ensure Bower is listed as an NPM dependency in the package.json file. If not then the Bower executable will not be available when the script tries to call it and you shouldn’t rely on Bower being available globally. This is also how it’s recommended to setup your apps for deployment to Cloud Foundry. The Cloud Foundry build pack for NodeJS will call npm install --production while staging the application. No need to commit your Bower dependencies when deploying to the cloud either.

  • Strict JavaScript for NodeJS

    This post is mostly a short reminder for myself as it’s contents is not new. As many of you probably know NodeJS runs on top of Google’s V8 engine, the same JavaScript engine used in the Chrome browser. V8 can take quite a few configuration options, try listing them out. I’m going to talk about the --use_strict option. Unfortunately the description you get is quite limited.

    node --v8-options | grep strict
    	--use_strict (enforce strict mode)
    

    Strict mode is part of ES5 so it’s quite well support in many browsers (except IE9, big surprise) as well as by NodeJS. By specifying it at the NodeJS command line strict mode is enabled for your entire application but it can be enabled on a per-file or function bases as well. Place a Sting literal at the beginning of a file or function to enable it "use strict";. As it’s just a normal String declaration it won’t break old browsers that don’t support strict mode.

    //Normal code
    var foo = 'bar';
    (function(msg){
    	"use strict";
    	//Strict code
    	alert(msg)
    	...
    })(foo);
    //Normal code
    

    Shown here inside a self executing function, this is a good pattern for making strict JavaScript libraries. What does strict mode actually do? It makes JavaScript more grown up and stops you doing bad things in your code.

    • Any attempt to get or modify the global object will result in an error: foo = bar;//Error. No var so foo would get set on the global object.
    • null values of this will no longer be evaluated to the global object and primitive values of this will not be converted to wrapper objects.
    • Writing or deleting properties which have there writeable or configurable attributes set to false will now throw an error instead of failing silently.
    • Adding a property to an object whose extensible attribute is false will also throw an error now.
    • A functions arguments are not writeable so attempting to change them will now throw an error arguments = [...].
    • with(){} statements are gone, if you know what they are you hopefully know why and if you don’t, just pretend you never came across them.
    • Use of eval is effectively banned.
    • eval and arguments are not allowed as variable or function identifiers in any scope.
    • The identifiers implements, interface, let, package, private, protected, public, static and yield are all now reserved for future use (roll on ES6).

    To keep JSLint happy you will need to place "use strict"; at the top of every file and when running Node itself you should run with the --use_strict option. This is easy to do with the NPM start script which I hope your using anyway. Change your package.json to contain the following property and start you application with npm start.

    "scripts": {
    	"start": "node server.js --use_strict"
    },

    I have kept things short here on purpose, for a more in depth look at strict mode and some new JSON features in ES5 have a look at this excellent post by John Resig, ECMAScript 5 Strict Mode, JSON, and More. I hereby give some (but not all) credit to his post for the content in this one. I think the changes strict mode makes and other changes coming in Harmony ES6 show that JavaScript is growing up and has a bright future, well I’m a fan at least.

  • NodeJS on Cloudfoundry – New Buildpack

    CloudFoundry-1

    Since my last post about monitoring NodeJS applications on CF (CloudFoundry) things have changed, both the NodeJS and CF worlds are fast moving ones. The default Node buildpack is currently a fork of the Heroku one, so most things explained here are relevant to Heroku as well.

    You no longer require a special buildpack to deploy an application on CF and have it monitored by StrongLoop. This also applies by to the New Relic and NodeTime (by AppDynamics) solutions as well. For all three solutions you just have to add a dependency in your applications package.json file and then require it at the beginning of your main JS file. For New Relic and StrongLoop you also have to add a file in the root of your application containing your api key and other config. NodeTime lets you supply this after the require statement, it’s personal taste but I prefer this as it’s one less file in your application root.

    require('nodetime').profile({
      accountKey: your_account_key
    });

    The new Node buildpack also brings with it some other changes. Previously you had to specify the command: in the manifest.yml file or provide a Procfile to tell CF how the application should be started. NodeJS, or more specifically NPM (Node Package Manager), provides a set of standard lifecycle hooks for a package that can be specified in your package.json file. Providing a manifest command or the Procfile still work but it’s best practice to use the NPM lifecycle scripts. The hook of interest is the start script, this shows an example scripts property in a package.json.

    "scripts": {
    	"start": "node server.js --some_arguments",
    	"test": "gulp test"
    }

    The CF NodeJS buildpack will look for a manifest command first and then fall back to the Procfile if no command is given. If the Procfile isn’t present it will check for the NPM start script hook and if it exists create a Procfile for you with web: npm start. Finally, if there is no start script, the buildpack will look for a server.js file in the root of the application and if it exists create a Procfile for you specifying web: node server.js. So it is enough just to call your main application file server.js for it to run but it’s best practise to be explicit and specify your NPM start script. Another benefit of using the script hooks is that other services can just call npm start (or any other lifecycle phase) to start your application without having to know the correct command and arguments. Starting with NPM will also add a number of potentially useful environment variable to your application. Remember that manifests and procfiles are specific to PaaSs like CF and Heroku. You can read more about NPM scripts here https://www.npmjs.org/doc/scripts.html.

    Finally, I have created a sample NodeJS application that includes everything I have talked about here and will display the applications environment variables to you. It’s ready to run on any V2 instance of CF. https://github.com/cgfrost/cf-sample-app-nodejs. In this sample application the buildpack is actually specified in the manifest but this is only to ensure you are using the latest NodeJS buildpack as some CF providers haven’t updated yet. As long as you application has a package.json in the root it will be detected and run as a NodeJS application.

  • Monitoring Node Apps on CloudFoundry

    CloudFoundry-1

    There are a few options for monitoring Node applications including NewRelic and NodeTime but I’ll be looking at StrongOps (previously known as NodeFly) by StrongLoop. It’s easy to get up and running with both NewRelic and NodeTime but the StrongLoop offering is particularly easy on CloudFoundry thanks to its custom build pack for deploying applications on Cloudfoundry, more on that later. They also have a lot to offer Node projects in addition to monitoring, check out their website for all the details. StrongLoop also do a lot of work on Node itself so arguably they know more about Node than most.

    Creating an application

    To get started you need an account at StrongLoop and to download their suite. This includes a command line tool slc which includes extra helper commands to get the most out of their offerings including some sample applications. I’ll use a simple instant messaging application to get started.

    slc example chat my-chat
    cd my-chat
    slc install
    node app.js

    The application should start and be available at http://localhost:1337, try opening it in several windows and talking to yourself.

    Monitoring with StrongOps

    Now there is a working application let’s get it running with StrongOps locally before deploying to Cloudfoundry. Create a StrongOps account if you haven’t already and then on the command line use slc to associate the application with StrongOps. Staying in the root of the application.

    slc strongops
    Please enter your: email address:
    Please enter your: password:
    You are now logged in. Welcome back, cgfrost.
    Your StrongOps credentials were written to: ./strongloop.json

    A strongloop.json file will be created in the root of the application that contains all the details needed to talk to the StrongLoop servers. There is an option to use package.json instead if you wish. Running the application again would send monitoring information to the StrongOps console but lets keep going and deploy to Cloudfoundry first.

    Running on Cloudfoundry

    Login in to your favourite Cloudfoundry provider, I’m using Anynines which currently have a free public beta. They are running on Cloudfoundry V2, it is not possible to run StrongOps on Cloudfoundry V1 as V1 doesn’t support custom buildpacks. Buildpacks are originally a concept that Heroku came up with, it is a piece of code that deploys and starts certain application types on a PaaS. It’s through buildpacks that PaaSs like Heroku and Cloudfoundry can support so many different runtimes. To use Anynines the best way to get going if your new to Cloudfoundry is to install their a9s Ruby Gem, see here for details. Once you have an account start by targeting and logging with the cf command line tool.

    cf target https://api.de.a9s.eu
    cf login

    Create a manifest.yml file to tell Cloudfoundry how to deploy the application. The cf command can create an application manifest but some of the config required will be missing. This is the manifest required for the sample chat application.

    ---
    applications:
    - name: chat
      memory: 512M
      instances: 1
      host: chat
      domain: de.a9sapp.eu
      command: node app.js
      buildpack: https://github.com/strongloop/dist-paas-buildpack.git
      path: .

    This manifest contains come common Cloudfoundry config such as memory and the number of instances as well as specifying the start command and buildpack to use. The command configuration should give the same command used to run the application locally, it’s required as Cloudfoundry isn’t able to detect every type of application and this ensures the Node application will actually be started. The buildpack configuration tells Cloudfoundry to explicitly use a buildpack from StrongLoop. This provides the StrongLoop Suite including the same version of Node as you have locally for development as there is no guarantee the version the Cloudfoundry provider has in its Node buildpack will match.

    cf push

    Once the application is pushed, go to your browser and test that the application is running (http://chat.de.a9sapp.eu with the above manifest). Talk to yourself some more to generate some traffic. There should now be traffic reported in the StrongOps console, http://strongloop.com/ops/dashboard. I found there is a minute or two of lag so be patient.

    StrongOpsDashboard

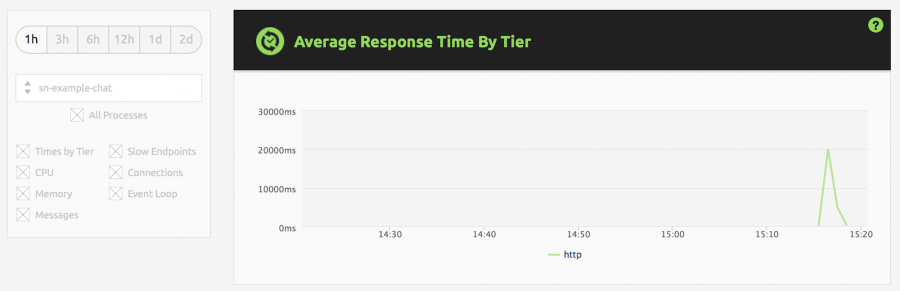
    Have a look around the console to see what metrics are available and try out the memory/CPU profiling. The metrics will be a little limited by the simple sample application but it will give you a good idea of what’s there. There are also some features only available to the paid plans. Happy monitoring.